
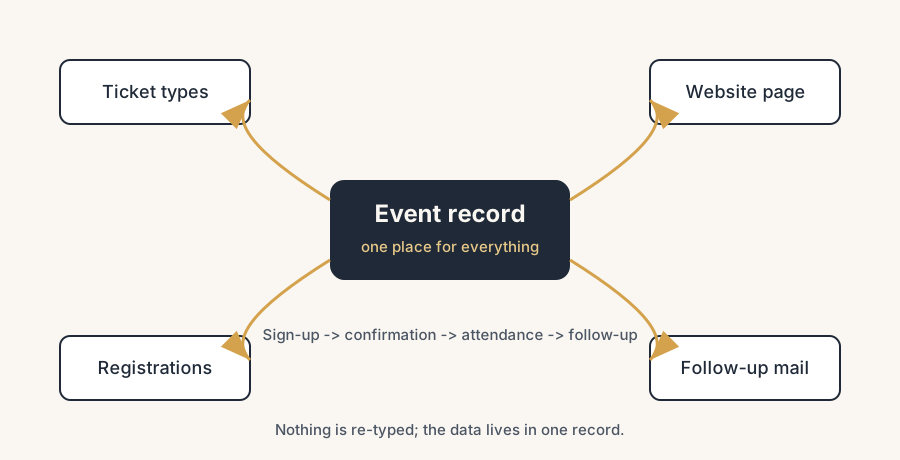
One Odoo event record can hold the whole thing: the registration page, the ticket tiers, the payments, the reminder schedule and the attendance list. The side tools and their mismatched lists can go, provided the standard flow fits how your tickets are bought.
You are organising a customer day or a webinar, and the moving parts live everywhere. The invite is in your mail tool. The sign-up form is a separate web form that drops names into a spreadsheet. Tickets are a PDF someone designed by hand. The reminder a week before is a manual mailing, and the thank-you afterwards never goes out because by then everyone has moved on to the next thing.
Then comes the part that hurts: a week before the event you have three lists that do not match, you do not know who actually paid, and you have no idea who showed up. Every event becomes a small project run on glue and good intentions.
If you already run Odoo, you do not need any of those side tools. The Events app holds the event, the ticket types, the public registration page and the full email schedule on one record. This article shows how to set that up, where people trip, and when an event is big enough to call a partner.
Why it happens
Events feel like a one-off, so people solve them with whatever is at hand. A form here, a mailing there, a spreadsheet to glue it together. Each tool is fine on its own. The problem is that none of them talk to each other, so a registration never becomes an attendee, and an attendee never becomes a follow-up. You end up re-typing the same names three times and still losing track.
Odoo treats an event as one record with everything attached: tickets, registrations, the website page and the communication schedule. One registration flows straight through to a confirmation email, a seat count, a QR code and a slot in your reporting. Nothing is re-typed, because there is only one place where the data lives.
The fix, in numbered steps
Create the event
Open the Events app and click New. Give the event a name, set the start and end date and time, and set a venue or mark it as online. Set the Limit Registrations if the room or the webinar has a cap, so Odoo can close sign-ups automatically when you are full. Save it. The event now exists as one record that everything else hangs off.
If you run similar events often (a monthly webinar, a recurring training), build it once and save it as a template. Next time you start from the template instead of an empty form.
Add ticket types
Go to the Tickets tab and click Add a line for each ticket you want to offer. In the Product field, pick the preconfigured Event Registration product or type a new name and create one. Set the Price (use 0 for a free event), the Sales Start and Sales End dates, and a Maximum quantity per ticket if you want to cap that tier.
You can add several tiers on one event: Early bird, Standard, Partner, Student. Each tier has its own price, its own sales window and its own cap. That is how you handle a free webinar and a paid conference with the same tool.
Turn on online ticketing
Go to Events > Configuration > Settings. In the Registration section, switch on Tickets and Online Ticketing. This lets visitors pick a ticket and register themselves on the website, instead of you typing them in by hand. If your tickets have a price above zero, Odoo links to the Sales and Invoicing flow so the payment is handled and invoiced, not tracked on a sticky note.
Publish the website page
Every event gets its own page on your Odoo website with the description, the date, the location and a Register button. Open the event and use Go to Website to see the public page. Edit the content with the website builder, then hit Publish so it goes live. A visitor clicks Register, picks a ticket tier in the pop-up, fills in their details and is registered. No separate form, no spreadsheet.
Set up the communication schedule
Open the Communication tab on the event. This is where the follow-up lives. Click Add a line and pick (or create) an email, SMS or social template, then set the Trigger:
- After each registration: the confirmation email. It goes out the moment someone signs up and includes a unique QR code for entry.
- Before the event: reminders. Set the interval, for example 1 week before and 1 day before, so people actually show up.
- After the event: the thank-you and the follow-up. A recording link, a feedback form, a next-step offer.
Set these once on the event and Odoo sends them on time, every time, without you remembering to.
Run the door and review
On the day, use the registration desk to check people in (the QR code from the confirmation email speeds this up). Afterwards, the event record shows who registered, who paid and who attended, and your "After the event" mail has already gone out. The whole loop closed itself.
The part that trips people up
A few things catch almost everyone
Free events still need a ticket type. No ticket line means no Register button. Add a single ticket at price 0 so people can sign up.
Online Ticketing is a separate switch from Tickets. You can have tickets configured and still see no public registration because Online Ticketing is off. Both toggles in Settings need to be on.
The website page does not go live until you publish it. Creating the event is not the same as publishing it. The page sits unpublished until you hit Publish, and people quietly cannot find it.
Paid tickets pull in Sales and Invoicing. The moment a ticket has a price, you are in the order and invoice flow. Decide upfront how payment is collected and how the invoice is sent, or you will have registrations with no clean payment trail.
Sales Start and Sales End close the window silently. If a tier's sales window has passed, that ticket disappears from the page without an error. Check the dates if a ticket is not showing.
Communication triggers fire on the schedule you set, not retroactively. Add the "before the event" reminder well in advance. If you add it the day before with a "1 week before" interval, that mail has already missed its slot.
Check first whether the registration flow matches how your tickets are actually bought. The standard flow assumes one attendee per ticket, each with their own details. The moment a company buys ten tickets for ten colleagues whose email addresses you do not have, that assumption breaks. Decide the workaround before tickets go on sale: register the buyer as contact for all ten and collect the names later through a follow-up form, or keep group sales offline and enter the attendees yourself. The flow you choose at the door is always worse than the one you chose up front.
Quick checklist
- Event created with name, dates and registration limit
- At least one ticket type added (price 0 for free events)
- Tickets and Online Ticketing both switched on in Settings
- Website page edited and Published
- Confirmation email set on the "After each registration" trigger
- One or two reminders on the "Before the event" trigger
- A thank-you or follow-up on the "After the event" trigger
- Registration desk ready for check-in on the day
- Paid events: payment and invoicing flow decided upfront
FAQ
How do I sell tickets for an event in Odoo?
Add a ticket type in the Tickets tab of the event with a price above zero, then switch on Tickets and Online Ticketing in Events > Configuration > Settings. Paid tickets connect to Odoo's Sales and Invoicing so the payment is handled and invoiced automatically.
Can I run a free event in Odoo?
Yes. Add a ticket type with a price of 0. You still need at least one ticket line, otherwise the website shows no Register button.
Does Odoo send a confirmation email after someone registers?
Yes. In the Communication tab, set an email template on the "After each registration" trigger. Odoo sends the confirmation the moment someone signs up, including a unique QR code for check-in.
How do I follow up with attendees after the event?
In the Communication tab, add an email, SMS or social template and set its trigger to "After the event". Odoo sends it automatically once the event ends, so the thank-you or feedback request goes out without manual work.
Where do attendees register for the event?
On the event's own page on your Odoo website. Publish the page, and visitors click Register, choose a ticket tier and fill in their details. The registration flows straight into the event record, no separate form or spreadsheet.